Whole strawberries, shredded coconut, and white chocolate chips with a hint of vanilla muffins

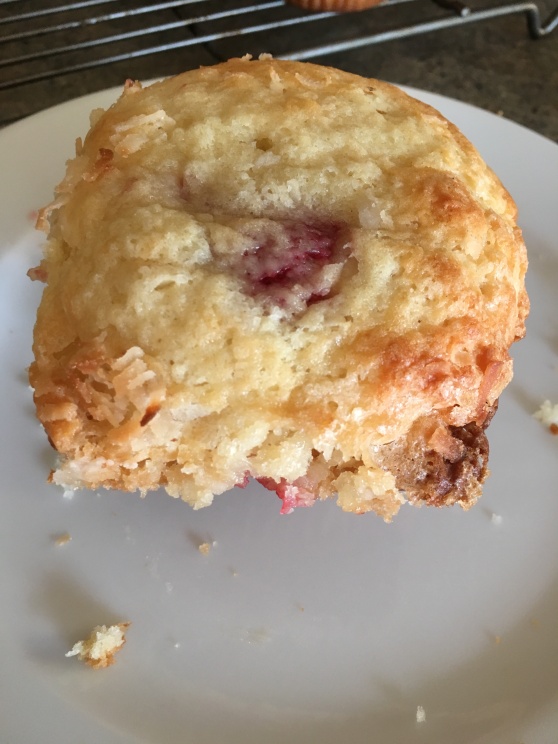
Muffins with whole frozen strawberries, shredded sweetened coconut, white chocolate chips with a hint of vanilla. They are topped with shredded coconut to give them the slight crisp top.

The crumb is so tender that they require a paper cup otherwise they would fall apart. A fork was required for sure this time around!.

IMG_0199

Makes 12 large muffins.

 The Ingredients

  • 10 tablespoons unsalted butter – softened (I put mine in the microwave for 10 seconds)
  • 1 cup granulated sugar
  • 1 teaspoon vanilla extract
  • 2 tables spoons of orange juice
  • 1/2 cup of shredded sweetened coconut flakes
  • 2 large eggs
  • 3 cups unbleached all-purpose flour
  • 1 tablespoon baking powder
  • ½ teaspoon baking soda
  • ½ teaspoon table salt
  • 1 ½ cups lemon flavor low-fat yogurt (not Greek style)
  • 1/4 white chocolate chips
  • 1 ½ cups frozen whole strawberries
  • about 1/2 cup of shredded sweetened coconut flakes – for topping
  • 12 paper  muffin cups

The how

  1. Preheat oven to 375 degrees making sure your oven rack is in the lower middle position.
  2. Beat the soften butter and sugar with mixer on medium-high speed starting at a lower speed to prevent a big mess. Do this until it is light and fluffy (for just a few minutes).
  3. Add vanilla extract, orange juice, 1/2 cup coconut flakes then one egg at a time, mixing well after each egg.
  4. Whisk flour, baking powder, baking soda, and salt in medium bowl.
  5. With the mixer, beat in half of dry ingredients and half of yogurt into the butter sugar. Repeat with the remaining.
  6. Fold in white chocolate chips then strawberries
  7. Add 12 paper cups to a muffin tin
  8. Using a large ice-cream scoop, add one heaping scoop per paper lined tin
  9. Sprinkle each muffin with coconut flakes
  10. Bake for 25-28 minutes – You are looking for a golden brown top
  11. Remove muffin tin from oven and rest for five minutes on the cool stove top or wire rack
  12. Remove muffins from tin and place on wire track to cool for just a few minutes
  13. Eat warm!

Flax Seed Oat Muffins

A muffin with the health benefits of Flax Seed and Oats without sacrifice to taste. These are tender and moist with just enough sweetness to satisfy your sweet tooth.

IMG_0085

Flax Seed Oat Muffin

The Ingredients

  • 10 tablespoons unsalted butter – softened (I put mine in the microwave for 10 seconds)
  • 1 cup granulated sugar
  • 2 large eggs
  • 1 teaspoon vanilla extract
  • 1 cup old fashion oats
  • 2 cups unbleached all-purpose flour
  • 1/4 cup Flax Seed  – slightly ground (you get more health benefits this way)
  • 1 tablespoon baking powder
  • ½ teaspoon baking soda
  • ½ teaspoon table salt
  • 1 ½ cups lemon flavor low-fat yogurt (not Greek style)
  • Paper  muffin cups
  • About 12 tablespoons of old fashion oats for topping

The how

  1. Preheat oven to 375 degrees making sure your oven rack is in the lower middle position.
  2. Beat the soften butter and sugar with mixer on medium-high speed starting at a lower speed to prevent a big mess. Do this until it is light and fluffy (for just a few minutes). Add vanilla extract then one egg at a time, mixing well after each egg.
  3. Whisk flours, Flax seed, baking powder, baking soda, and salt in medium bowl.
  4. With the mixer, beat in half of dry ingredients and half of yogurt into the butter sugar. Repeat with the remaining.
  5. Add 12 paper cups to a muffin tin
  6. Using a ice-cream scoop, add one scoop per paper lined tin
  7. Sprinkle each muffin with oats making sure you see no batter
  8. Bake for 25-28 minutes – You are looking for a golden brown top and making sure the muffin tops spring back when you lightly push them.
  9. Remove muffin tin from oven and rest for five minutes on the stove top
  10. Remove muffins from tin and place on wire track to cool for just a few minutes
  11. Try not to eat all in one sitting!

IMG_0086

Meatballs with Spinach…what!?

20130922-211550.jpg

It tastes much better then the picture does. 😉

Homemade meatballs with Spinach yes they are good. No I mean they are really good and would go so far to say they are the best meatballs I have ever made and the best tasting meatballs I have ever tasted!

Ingredients
1 pound Ground Chuck 85/20
1 pound Ground Pork
6 oz thawed Chopped Spinach – squeeze out as much of the liquid as you can
1 large Egg
1/2 cup Bread Crumbs – I used bread crumbs that I ground from a stale homemade French bread
1/2 cup finely grated Parmesan cheese
1 teaspoon Salt
1 1/2 teaspoons dried Parsley
1 1/2 teaspoons dried Basel
1 1/2 teaspoons Garlic powder
1/2 teaspoon Red Pepper flakes

3/4 cup Bread Crumbs for coating meatballs

Mix it, meld it, roll it, cook it
1) Add all ingredients to bowl expect the 3/4 cup of bread crumbs
2) Mix well with your finger tips trying not to squish the mix but just blending well
3) Cover with plastic wrap, pressing wrap to mix so there is no air gap
4) Store in Frig for at least a few hours to meld the flavors. Mine was in the Frig for about 5 hours
5) Form meatballs to even sizes. I used a scale ensure each meatball weighed about the same
6) Coat each meatball with remaining 3/4 cups of bread crumbs. I put the bread crumbs in a bowl and rolled each ball around after I weighed the ball. Place meatballs on a large cooking sheet.
7) Preheat oven to 400 F
8) Cook for about 20 minutes turning over halfway through the cooking time.

I served these with homemade Pasta and sauce top with Parmesan cheese (see picture below).

This recipe was inspired by Alton Browns meatball recipe and recent podcast. He knows what he is doing, even though I changed the recipe.  Sorry I just won’t eat Lamb.

IMG_1236

And this is was the leftovers!

My Birthday Cake

it tastes better then the picture.

it tastes better then the picture.

Happy Birthday to me! This cake had a rough start and was almost never posted. Why? Because my wife and daughter did not like the cake at the first tasting. I liked it and my son liked it and also thought the more for me and my son. BUT, after being in the Frig over night both my wife and daughter now love it. My son and I continued to enjoy it cold and yes it did taste better cold so I knew I had to post this experience.

A little background on how I came up with recipe and even knew before I cooked it that this might get mixed reviews. I was on one of my regular walks enjoying the weather trying to think of a cake to make for my birthday. I wanted something different then I have made before and maybe even try something a bit risky. The risky part was putting strawberry syrup in a white cake which of course is going to make it heavy and not so white. Plus I wanted to use up the heavy whipping cream to make coco frosting, which could make it look bland or like sandpaper.

Well enough chatting, onto the recipe which started out as the recipe found on the back of the Swans Down Cake Flour box and morphed into what you see below.

I used two 9″ round pans which should have been 3. I cooked it longer to compensate.

Ingredients

  • 3 cups Swans Down Cake Flour, sifted
  • 2 teaspoons Baking Powder
  • 1/2 teaspoon Salt
  • 1 cup Butter, softened
  • 2 cups Sugar
  • 4 large Eggs
  • 3/4 cup Skim Milk
  • 1 teaspoon Vanilla Extract
  • Strawberry Syrup (see my recipe here using all strawberries)
  • Coco Frosting:
  • 1 cup Heavy Whipping Cream
  • 2 tablespoons of Cocoa Powder – I used Nestle
  • 1 tablespoon of Sugar substitute  – if you want it sweeter add more to taste

The steps to a tasty result

  1. Sift flour with baking powder and salt
  2. Cream butter and sugar until light and fluffy in your mixer
  3. Beat on medium speed, adding eggs one at a time, yes one at a time
  4. Add a bit flour mixture then milk and extract until all used up but cream until smooth after each addition
  5. Pour into 2 greased 9 inch round pans then swirl in homemade strawberry syrup (see picture below) using the end of a wooden spoon handle to do the swirl. Don’t swirl to much.
  6. Bake at 325 degrees for 25-30 min using the tooth pick method making sure it comes out clean
  7. Cool in pan for 10 minutes then remove cake from pan and cool completely on racks
  8. While the cake is cooling make the frosting. First things first put the mixing bowl and whisk attachment into the freezer for at least 15 minutes
  9. Remove bowl and whisk from freezer and  immediately pour the heavy whipping cream into the bowl and whisk away starting at a slow speed increasing to a high speed until stiff peaks form. Watch carefully testing often!
  10. Add coco and sugar substitute to the mix and blend well
  11. Spread layer of frosting  onto of a layer of cake then stack the cakes and frost the entire cake.
  12. At this point you can add more strawberries to the cake top to enhance the look but me I ran out of strawberries
  13. Now an important step according to two members of my family, refrigerate the cake before eating
  14. Eat but before you do sing happy birthday to me first
Don't swirl to much!

Don’t swirl to much!

Add some garnish if you want.

Add some garnish if you want.

Belgium Waffles

Grandma (my mom) sent my son something special just for him but the whole family benefits from this gift too! My son enjoys cooking just like I do so this gift is a natural fit of course. The gift is a Belgium Waffle maker! This is a nice one too! It cooks them perfectly, easy to clean, cooks two at a time, and of course “cool looking” according to my son. I have to agree. I have not used it myself but I am sure it is easy to use as well. This is also a great gift because it gives my son and I more time together and something we can share in common. What a great grandma we have!

Of course we HAD to use it the very day it was delivered via UPS. But as luck would have it UPS was running about a hour or so later then normal. My son did not know it was on the way so I had to stall dinner. Little did I know that Belgium Waffles take more then a hour to prepare. So we went with standard waffles that night. But now that it’s a few days later we can make true Belgium Waffles,  the recipe and experience follows.

The Maker

The Maker

Feed Me!

Feed Me!

Can I eat now?

Can I eat now?

This recipe is a modified version from the manual. For those of you that are interested in the unit model it’s Warining Pro WWM1200SA (this is a really nice one!)

Ingredients

  • 1 1/2 cups water
  • 1 packet (2 1/3 teaspoons) Active Dry Yeast
  • 3 cups of All Purpose Flour
  • 1/4 teaspoon Salt
  • 3 Lagre Eggs – seperated Plus 1 Egg White
  • 1/3 cup Sugar
  • 1 1/2 cups Skim Milk
  • 8 tablespoons Unsalted Butter – melted and cooled
  • 2 tablespoons Vegetable Oil
  • 2 teaspoons Vanilla Extract

The long time to eat steps (1 hour is a long time when you are hungry) – This takes 1 hour after you blend all the ingredients!

  1. Heat half of the water to lukewarm (105-110 F) and add to a large bowl then add yeast and a pinch of sugar to dissolve. This will foam when done about 5 to 10 minutes.
  2. Add flour and salt to a large bowl then stir to blend then set aside
  3. To the dissolved yeast bowl add egg yokes, one egg white and the remaining sugar stir to blend
  4. Add the reaming water, milk, melted cooled butter, oil and vanilla extract  stir until smooth
  5. Add the liquid mix to the dry mix and beat until smooth
  6. In your mixer bowl add the egg whites and beat until stiff speaks are formed (see picture below)
  7. Fold egg whites into batter
  8. Let the batter stand for 1 hour coming back every 15 minutes to stir. During this time the batter will be rising and smells so good!
  9. Heat the waffle maker, when heated pour batter into maker making sure to distribute batter evenly and push down into grids. This is yeast based so you will have bubbles.
  10. Cook per manufactures directions
  11. Top with your favorite topping (see my post here for an idea) and enjoy. You will!
Stiff Peaks from beating the egg whites

Stiff Peaks from beating the egg whites

Fold in the egg whites

Fold in the egg whites

Stir every 15 minutes for 1 hour

Stir every 15 minutes for 1 hour

The batter will rise over the hour. Oh waiting for the waffle iron to heat up!

The batter will rise over the hour. Oh waiting for the waffle iron to heat up!

Add some batter with the provided measuring cup

Add some batter with the provided measuring cup

be sure to spread evenly and get the batter into the grids.

Be sure to spread evenly and get the batter into the grids.

IMG_1206

Pasta, Egg, Ham and Cheese Bake

Time to eat!

Time to eat!

Pasta, eggs, ham and cheese who knew it could be so good and easy to make. You can also add some additional toppings such as salsa, hot sauce, veggies, or whatever floats your boat.

Ingredients

  • 1 pound Lumaconi pasta – my favorite
  • 1 pound ham steak – chopped
  • 8 large eggs
  • 2 tablespoons butter
  • 8 oz shredded cheese reserving some for the topping – perhaps chedder thats what I used

The steps to goodness

  1. Cook pasta per package directions
  2. Preheat of to 450 F
  3. Break eggs into large pan and scrambled eggs making sure you cook with the butter
  4. In a casserole dish (greased) add pasta, ham, and egg and blend well. Don’t break up the egg to much the egg pieces should be in small bite size pieces
  5. Add cheese to the blend and mix well
  6. Flatten out blend and top with cheese
  7. Cook in oven for about 10 minutes or until cheese topping is a lite gold color
  8. When serving be sure to include topping on each plate. You can add some additional topping such a salsa or hot sauce.

IMG_1176

Before the bake

Before the bake

Hows this view before the bake?

Hows this view before the bake?

All warm and ready to eat!

All warm and ready to serve!

Coffee Cake Muffins with Strawberry Surprise

Yum!

Yum!

I needed to use up the strawberries in the Frig before they went bad. What to make with strawberries? Coffee cake muffins of course!

These are a bit dense with strawberries just under the topping and there is a bit of topping through the center of the muffin forced in with the handle end of a wooden spoon to give that extra surprise in taste. Test taste results was thumbs up around the room and mouths where full enjoying the tasty muffins.

Ingredients for the Muffin Bottom

  • 1/4 cup butter
  • 3/4 cup white sugar
  • 1 large egg
  • 1 1/2 cups all-purpose flour
  • 2 teaspoons baking powder
  • 1/2 teaspoon salt
  • 1/2 teaspoon Vanilla extract
  • 1/2 cup skim milk
  • 1/2 cups sliced strawberries or just enough to top all of your muffins

Ingredients for the Muffin Top

  • 1/2 cup all-purpose flour
  • 1/2 cup light brownsugar
  • 1/4 cup butter, softened I put mine in the microwave for 10 seconds
  • 1/4 cup flaked sweated coconut (optional)

Mix, cook it , eat it

  1. Preheat oven to 350 degrees F
  2. Grease a muffin pan – makes 12
  3. Beat with electric mixer 1/4 cup butter in a bowl until creamy
  4. Add 3/4 cup sugar and egg to the mix and yes mix well
  5. Add flour, baking powder, and salt together in a separate bowl and mix.
  6. Stir the flour mixture and milk into butter sugar mixture and mix until combined
  7. Using a spoon fill muffin tins
  8. Arrange strawberries on top the batter (see picture below)
  9. Now for the sugar topping
  10. Mix flour, sugar and butter together in a bowl. You may need two butter knives to cut the butter into the mix
  11. Sprinkle topping over strawberries
  12. Use the handle end of a wooden spoon to push a single push of topping into the batter to give that extra surprise (see picture below)
  13. Top with coconut – optional
  14. Bake until a toothpick inserted off  the center of the muffin comes out clean, about 35 minutes
Strawberry topping

Strawberry topping

The wooden spoon step

The wooden spoon step

Before the heat

Before the heat

IMG_1168

Heated and cooling for a bit.

IMG_1167

That’s some detail

Enough already just eat me!

Enough already just eat me!

Homemade Dough and Pizza Sauce with the KitchenAid Attachment – Strainer

My mother in law came for a visit and in tow she had a plastic bag full of KitchenAid stand mixer attachments! She said she was doing some cleaning in the basement and found these from about 15 years ago which were never used. She took a chance bringing them as she did not know for sure which mixer I had. But as you know, if you are a regular reader of my blog that my mother bought me a KitchenAid stand mixer just a short time ago (I love this thing if you could not tell and sorry that I have not posted all the things I have made with it. Sometimes I get so involved in cooking that I forget to get the camera out.). Here is the contents of the bag:

  • Fruit/Vegetable Strainer Set (used in the recipe below)
  • Slicer/Shredder Attachment
  • Food Grinder Attachment
What's in the bag

What’s in the bag

I came up this pizza sauce recipe while at the farmers market looking at all the fresh produce. I just LOVE fresh produce!

Ingredients for pizza sauce

  • About 5 large red ripe tomatoes – strained through the KitchenAid Fruit/Vegetable Strainer
  • 2 table spoons of extra virgin olive oil  – I used Oliveto Mediterranean Blend – first cold pressed – Yum!
  • 1 medium sized yellow onion – diced
  • A couple dashes of kosher salt
  • A couple of grinds of black pepper
  • 1 to 1 1/2 cups of fresh Basal, no stems – chopped – THIS IS A MUST!
  • 2 cloves garlic – diced

Sauce is boss

  1. Using the KitchenAid Fruit/Vegetable Strainer strain the tomatoes. I am sure you can strain these by hand but it would take longer.
  2. In a medium sized sauce pan add olive oil and heat over medium high heat, add onion and salt and lightly brown the onions  – around 10 minutes
  3. Add strained Tomato sauce and boil covered for 10 minutes
  4. Remove cover reducing heat to low for about 35 minutes.
  5. Add basal, garlic, pepper and continue over low heat until sauce has reduced to the thickness you would like. I added about another 30 minutes or so.
Dough and Sauce

Dough and Sauce

Ingredients for Pizza Dough

  • 1 package active dry yeast
  • 1 cup warm water (105° F to 115°F)
  • 1/2 tsp salt
  • 2 tsp extra virgin olive oil
  • 1/4 cup cornmeal plus a dash extra for the pizza pan
  • 2 1/4 to 3 1/2 cups all-purpose flour
  • Your toppings

Build the pizza from the dough up

  1. Dissolve yeast in warm water in warmed mixer bowl
  2. Add salt, olive oil, 1/4 cup cornmeal and 2 1/4 cups flour
  3. Attach bowl and dough hook to mixer
  4. Turn to Speed 2 and mix about 1 minute
  5. Add remaining flour, 1/2 cup at a time, and mix about 3 minutes. The dough should clean sides of bowl during this time and then start to ride up the hook. Please note humidity and temperature can have a huge impact on how the dough will perform. Your dough may be too sticky or too dry so add a table spoon of water or flour at a time to get the proper behavior as described.
  6. Place dough in greased bowl, turning to grease all sides of dough ball.
  7. Cover with plastic wrap and let rise in warm place, free from draft, about 1 to 1 1/2 hour. I put mine in a cold oven.
  8. Preheat oven to 450 F – Don’t forget to remove the dough! he he.
  9. Punch dough down, yes with your fist!
  10. Brush 14″ pizza pan with oil. Sprinkle with cornmeal. I use a cast iron pizza pan and this recipe reflects that.
  11. Roll dough out to a disc on a floured surface about and inch or two larger then the size of the pizza pan. I make two pizzas with this recipe. One small personal pizza and the larger one. Just cut of a bit of dough for the smaller pizza.
  12. Place on pizza pan and form a ridge around edge of the dough
  13. Add toppings
  14. Heat pan on stove until you see a bit of steam being release from below the dough
  15. Bake at 450°F for 10-15 minutes or until cheese is just golden brown
  16. Let rest for one minute then slice and enjoy!

The test taste results: Bowing down on the floor, I am not worthy. This is so good! Yum! wait I need to test it again. Yum! Wait one more time just in case. Yum!!!

Top me!

Top me!

Chocolate Cake With Strawberries On Top

Happy Birthday Erik!

Happy Birthday Erik!

I wanted to make a cake for my son’s birthday using what I had on-hand. The cake had to be chocolate flavor and of course had to be good. I have not made many cakes in the past and wanted something different then I have made before. So off to the internet search I went. What to enter, I did have Hershey’s Cocoa on hand so lets go with that. First thing to popup was “Really Chocolate Chocolate Cake” from the Hershey’s Kitchens. This has to be good, so I called my son in to see the picture and recipe  and asked if he would like this. He said “YEEEEEESSSS!!!!!”. That was easy! I followed the recipe pretty close only reducing the powdered sugar by a half a cup to 3 1/2  for the frosting, adding the sliced strawberries as a topping  and love to the recipe.

The test taste results:

Great!

Yum!

mmm amma mmmeuumm (I think they said, this tastes great or something like that)

This beats store bought

Leftovers are better then the day before

Ingredients for Cake

  • 2 cups sugar
  • 1-3/4 cups all-purpose flour
  • 1 cup Hershey’s Cocoa
  • 1 tablespoon baking powder
  • 1 teaspoon salt
  • 2 eggs
  • 1 cup skim milk
  • 1/2 cup vegetable oil
  • 2 teaspoons vanilla extract
  • 1 cup boiling water
  • Chocolate Fudge Frosting (see below for the recipe)
  • A handful of sliced or whole strawberries – be creative!

Make the cake

  1. Preheat oven to 350°F
  2. Grease and flour two 9-inch round baking pans. Don’t leave any loose flour in pan
  3. Stir together sugar, flour, cocoa, baking powder and salt in large bowl
  4. Add eggs, milk, oil and vanilla then beat starting on a low speed (otherwise you will make a mess) increasing to medium speed of electric mixer for 2 minutes
  5. Stir in boiling water
  6. Pour batter into greased and floured pans
  7. Bake 30 to 35 minutes or until wooden pick inserted in center comes out almost clean
  8. Cool cakes in pans for 10 minutes
  9. Remove cakes from pans to wire racks and cool completely (do not sneak a bite I will know about it!)
  10. Frost with Chocolate Fudge Frosting – see below. Adding frosting to the first cake then top with the second cake and add frosting to the stack
  11. Top with strawberries
  12. Store in cool place as the frosting is mostly butter after all
  13. Sing “Happy Birthday” (the traditional song as I think the copyright was removed)

Ingredients for Chocolate Fudge Frosting

  • 3/4 cup (1-1/2 sticks) butter, melted
  • 1 cup Hershey’s Cocoa
  • 3-1/2 cups powdered sugar
  • 1/2 cup skim milk
  • 2 teaspoons vanilla extract

Make the frosting

  1. Place melted butter in large mixer bowl
  2. Add cocoa and stir until smooth
  3. Gradually (I mean this!) beat in powdered sugar, milk and vanilla
  4. Beat until smooth
The dark cake and white does not work well with a smart phone camera.

The dark cake and white plate does not work well with a smart phone camera.

Ditto from above capitation.

Ditto from above capitation.