Chicken Asparagus Bacon Crunchy Wrap

Crunchy and tasty

Crunchy and tasty

One recent late night this recipe came to me. I am not sure why it came to me but it does not matter now I just had to give it a try.  It turned out just as I expected it to and that would be a crunchy not overpowering taste but satisfying to the taste buds.

Ingredients – for 6 wraps

  • 2 Boneless Skinless Chicken Breasts
  • 6 Asparagus – uncooked and be sure to cut off about a 1/2 unch from the bottom of the spear
  • 1/2 Cup Parmesan cheese – shredded
  • 3 Bacon slices cooked – slice the bacon length wise
  • 6 Flour tortillas
  • 1/4 cup of vegetable oil
  • a few tablespoons of finely grated Parmesan cheese
  • 2 tablespoons  – Balsamic vinegar

Top it, Wrap it, Cook it

  1. Preheat oven to 350 F
  2. Cook chicken in a skillet heated to medium high for about 4 minutes per side – you might want to add a dash of salt to each piece of chicken
  3. Cut the Chicken into strips then cook an additional minute or two turning to brown all sides
  4. Add oil to a plate or other shallow dish
  5. Heat stack of tortillas in the microwave for about 45 seconds
  6. Using tongs pick up one tortilla at a time and coat both side with oil. Allow oil to drip from the tortilla
  7. Place tortilla on a flat surface then add  shredded Parmesan cheese, bacon and finally chicken.
  8. Just roll this thing up and place it seem side down on a baking sheet. Repeat until done.
  9. Bake in oven for about 20 minutes until the tortillas are hard and a bit brown
  10. Plate a serving topping with a splash of  Balsamic vinegar and a dash of grated Parmesan cheese
  11. Eat!
Just before we wrap

Just before we wrap

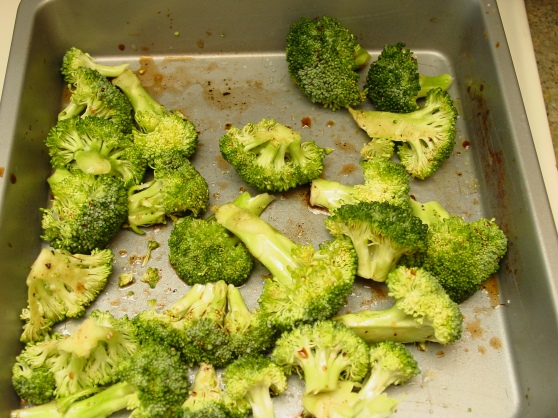
I added a side of Broccoli florets that had a splash of  Balsamic vinegar, splash olive oil, salt and pepper. I put this in a shallow baking dish adding it to the oven with the wraps.

Before the cook

Before the cook

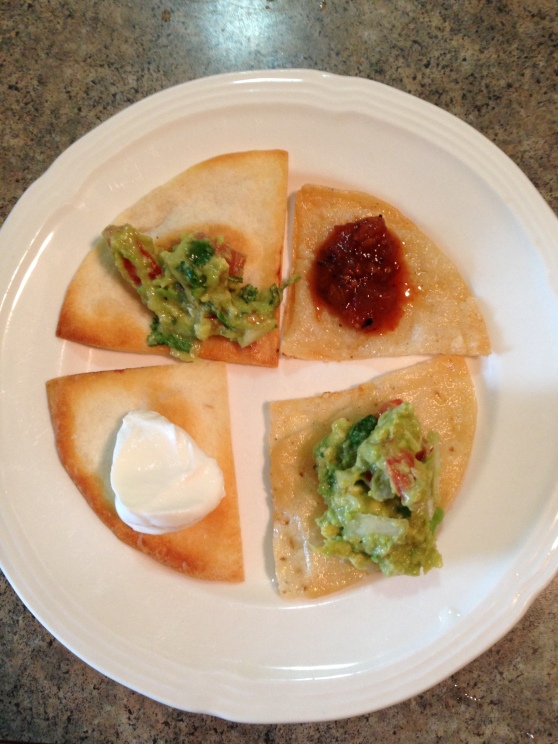
Having fun with Quesadillas oh and a side of homemade baked tortilla chips!

IMG_0986

Fun with Quesadillas!

IMG_0980

Add the chips too!

With Cinco de Mayo coming up and great food sales what better way to celebrate and have fun with food by making Quesadillas and tortilla chips! Yes I know Quesadillas are easy to make but they still taste good and the real fun part is coming up with your own creation. I am going all out here not just cheese but a blend of different ingredients some even leftovers.

I also made some homemade tortilla chips and will start with those first. The homemade baked tortilla chips are very easy to make and taste so much better then store bought.

The making of a chip

The making of a chip

Ingredients for Tortilla Chips

  • Tortillas – flour or corn or both – I went with both
  • Vegetable oil – small bowl enough to dip a cut tortilla into
  • Lime juice – from a fresh squeezed lime
  • Kosher salt

Baked Tortilla Chips Steps

  1. Preheat oven to 400 F
  2. Cut a stack of tortillas with a pizza cutting into well pizza looking slices
  3. Combine the oil and Lime juice blend well
  4. Using tongs dip each tortilla slice into the oil lime blend making sure the blend runs off the slice. You don’t want it to oily
  5. Place each oil lime coated pre-tortilla chip in a single layer on a baking sheet then put a dash of salt on each chip
  6. Cook for 7 minutes but check after 5 minutes. You are looking for these to brown just a bit and maybe even bubble a bit. Once you learn your oven you should be good to go without watching it. Mine was 7 minutes.
  7. Once done place on a plate and let cool for a bit. The chips will become more crunchy as the cool.
  8. Top then, eat them, enjoy them!

Moving on to the making the Quesadillas you need to decide what you want in them. I decided to go with the ingredients below but not all in one Quesadilla! I put out all the ingredients and have people decide what they want. It only takes a minute to build and a few minutes to warm up/cook.

What do YOU want in your

What do YOU want in your Quesadilla?

Ingredients for your Quesadilla – pick one pick all it’s up to you

Build your Quesadilla!

  1. Place cheese on half a tortilla
  2. On the same half add a couple of table spoons of select ingredients from above. Be creative here and mix it up!
  3. Top with cheese – yes on the same half. The cheese will help it stick together
  4. Fold over the empty side an add to a medium high heat skillet for a few minutes each side
  5. Remove from skillet once the cheese is melted and the tortilla is slightly brown
  6. Wait a few minutes for the Quesadilla to cool before cutting with a pizza cutter
  7. You can top them, dip them or just dive in and eat them. These are so good!
In the skillet waiting for side one to melt the cheese and tortilla to slightly brown

In the skillet waiting for side one to melt the cheese and tortilla to slightly brown

Burrito time – with grilled Steak!

Enlarged to show texture

Enlarged to show texture

When I want a Burrito I want a Burrito! There was a great sale on Sirloin steak at the store and it’s too cold outside for the gill so that means it’s steak burrito time! You can put whatever you want in a burrito so be creative. I do recommend if you use rice do not use the minute kind. If you use the rice that takes longer you will be rewarded in taste and texture.

Ingredients – for two large Burrito

  • Guacamole – see my recipe Homemade Baked Taquitos and Guacamole
  • Burrito sized flour tortillas
  • Yellow onion – sliced (this ones for grilling)
  • Sirloin Steak – season with a dash of salt and pepper
  • 1 cup of pinto beans – cooked and drained
  • 1 cup of Colby cheese – shredded
  • Tomato – seeded and diced
  • Yellow onion – diced
  • 2 cups White Rice – cooked – the real stuff please none of that minute kind

Steps before you eat it

  1. Start cooking the rice, this can take a while
  2. Add diced tomato and diced yellow onion to a bowl and blend
  3. Grill the sliced onion in a skillet on medium high heat then remove and place on a serving dish
  4. Add steak to the skillet and cook until desired pinkness – me I went with 5 minutes per side. Remove and let rest on a cutting board for about 5 minutes then cut into bite size pieces
  5. Heat your clean skillet
  6. Place a tortilla on a flat surface then add these ingredients in the following order: Cheese->Rice -> Steak -> Beans -> Tomato and Onion bend -> Cheese
  7. Now fold it up! Fold the sides in then role up tightly until completely sealed
  8. Carefully transfer to your heated skillet (seem side down first) and lightly brown one side for about 30 or so then flip and repeat
  9. Move to a plate and slice. You can add the Guacamole and sour cream to the plate as well for dipping

Now you can eat it!

Meatball/Meatloaf Calzone

IMG_0958

Eat me!

I was trying to make a meatball Calzone but it ended up looking more like a meatloaf Calzone. It still tasted great and was a big hit for dinner and even leftovers. I would go so far to say it tasted even better as a leftover!

You will need pizza dough to make the Clazone which you can just use any pizza dough recipe. I went with the recipe from my bread machine book.

Ingredients for Calzone:

  • Pizza dough – homemade or store bought
  • 1 cup of Provolone cheese – shredded
  • Classico spaghetti sauce  – I love this stuff!

Ingredients for Meatball:

  • 1 pound of 93% lean ground beef
  • 1/2 cup of shredded Parmesan cheese
  • 1/2 Yellow onion – diced
  • 1 garlic cloves – diced
  • 1 cup of plain breadcrumbs
  • 1/2 teaspoon of fresh ground pepper
  • 1/4 teaspoon of red pepper flakes
  • 1/2 teaspoon of dried Basal
  • 1/2 teaspoon of dried Oregano
  • 1 pinch of Kosher salt
  • 1 large egg
  • 2 table spoons of tomato paste blend with a 1/4 cup of water

Build it, cook it, top it, eat it

  1. Make or purchase the pizza dough. I created mine with my bread machine
  2. Put all the Meatball ingredients into a large bowl and blend well
  3. Form the meatballs into even sizes – I made 5
  4. Put the meatballs in the Frig for about 15 minutes to cool back down so they will stay together during cooking
  5. Preheat a large skillet to medium high heat and place meatballs in skillet but make sure they are not touching. You will need to rotate the meatballs often so they cook evenly. I rotated them with a fork and spatula but be careful you don’t want these to fall apart. Cook for about 10 minutes or until brown with a crunchy outside.
  6. Remove from the skillet when done with a large spoon and place into simmering spaghetti sauce. Let the meatballs simmer for about 30 minutes.
  7. Preheat oven to 350 F
  8. Roll out dough into 6 inch discs just like you would do if  you where making a small pizza crust
  9. Place pinch of grated Provolone cheese in the center of the disc then place the sauced meatball in the center and wrap it up.
  10. Place seem side down on a baking sheet
  11. Brush each calzone with olive oil and top with the Provolone cheese
  12. Cook in oven for about 40 minutes
  13. Heat the spaghetti sauce
  14. When the calzones are done remove from oven and slice down the middle topping with spaghetti sauce and sprinkle with Parmusaun cheese
  15. Serve and enjoy!
IMG_0956

Cooked and ready for slicing and saucing.

Skillet to oven Cordon Bleu and Blue

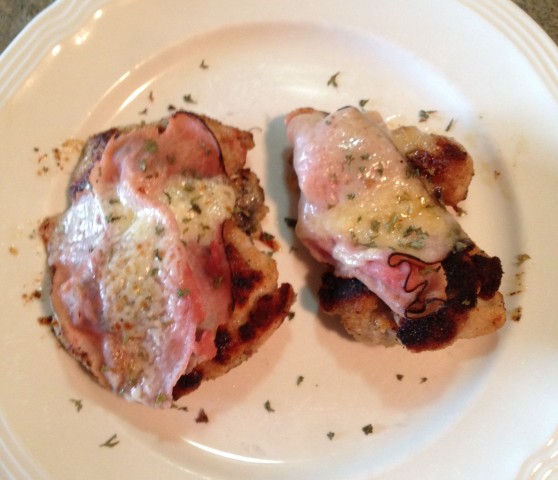
The one on the left has Blue cheese dressing the one on the right has Swiss cheese.

The one on the left has Blue cheese dressing the one on the right has Swiss cheese.

I was so impressed with tamaraleigh recipe that I had to try it the next day but I did not have the same ingredients so I improvised. I also wanted to experiment a bit and have a least one topped with Blue Cheeses dressing. I am glad I did! This is a tasty meal and actually it turned out much better then I expected! This is a keeper!

Ingredients

  • 20 oz of boneless skinless chicken thighs
  • 1 cup of plain bread crumbs
  • 1 teaspoon of Basal
  • 1 teaspoon of Oregano
  • 1 teaspoon of Kosher salt
  • Sliced Swiss Cheese – enough to top chicken
  • About a tablespoon of Blue Cheese dressing  – enough to top chicken
  • Black Forest Ham thinly sliced – enough to top chicken
  • Parsley – enough to pretty up your chicken
  • Olive oil – enough to coat bottom of of oven proof skillet – I recommend cast iron!

The steps for building this meal are not difficult and don’t have to be to create a great tasting meal.

Steps to goodness! 

  1. Move up the rack in your oven so when you put your skillet in the oven the top of the food will be about 5 or 6″ from the flame of the broiler. Turn on the broiler.
  2. Add Bread Crumbs, Basal, Oregano and Salt to a zip top bag. Mix it up a bit.
  3. Preheat your oven proof skillet to medium high heat with enough oil to just coat the bottom
  4. Put a few pieces of chicken at a time into the bag and shake to coat chicken
  5. Add chicken to the pan and cook 3-4 minutes on each side. Be sure not to burn the chicken it does have a breaded coating after all.
  6. Top each piece of chicken with a slice of ham
  7. Top each piece of chicken with either of the cheeses.
  8. Put the skilet into oven for a few minutes. You are looking to brown the cheese and toast the ham a bit
  9. Remove from the oven and sprinkle with Parsley
  10. Serve and enjoy you will!
A different viewl but the same applies, the one on the left has Blue cheese dressing the one on the right has Swiss cheese.

A different view but the same applies, the one on the left has Blue cheese dressing the one on the right has Swiss cheese.

Italian Beef with some heat and side of Yukon Gold

DSC00905

I love Italian Beef sandwiches and when you add Provolone cheese, grilled green peppers and onion with a dab of horseradish you have the perfect blend of flavors!  All you need now is a side of Yukon Gold potatoes and veggies and you are set.

Usually I cook potatoes in the microwave if I am going to cook them whole as it’s fast, easy,  little fuss and tastes good. This time around I wanted to try something different, boiling. I wanted Yukon Gold potatoes for dinner and thought what about boiling these in Chicken Broth then just smash and pan fry them a bit to look as a golden nugget would.

Golden Nuggets ingredients

  • Small Yukon Gold potatoes
  • Chicken Broth – enough to cover the potatoes half way
  • Water – enough to cover the potatoes the other half of the way

DSC00891

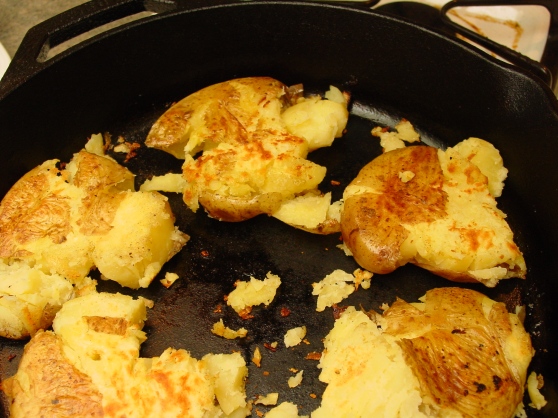
To make the golden nugget clean the potatoes and add them to a sauce pan covered halfway up the potatoes with chicken broth then cover completely with water. Bring to a boil then simmer for 10-20 minutes until the potatoes are tender when you poke it with a fork.  Once tender transfer the potatoes to a skillet heat to medium high heat with just a coating of oil in the skillet. Gently smash the potatoes with something flat, I used a metal spatula. Don’t smash to hard as you are not making hash browns.  Cook about 3-4 minutes per side until you have the golden brown crispness. Season to taste, perhaps just a bit of salt then serve.

Golden goodness ready for the plate!

Golden goodness ready for the plate!

Italian Beef Sandwiches!

While you are cooking the potatoes you can prepare the Italian Beef sandwiches.

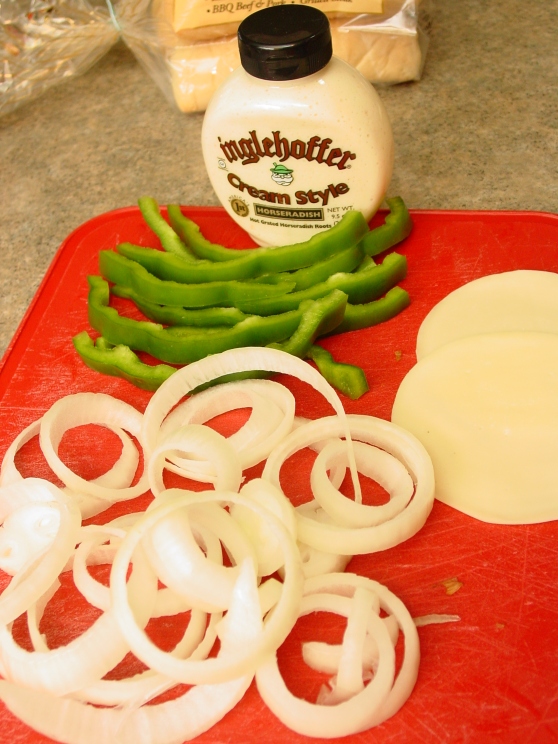
Italian Beef Sandwich ingredients

  • Green Pepper – Sliced
  • Yellow Onion – Sliced
  • Provolone Cheese
  • Horseradish – Cream Style
  • Italian Beef – I went with Papa Charlie’s Italian Beef this time around. You can make your own and I have but I don’t have a meat slicer.
  • French Rolls – I went with S. Rosen’s French Rolls which are my favorite for packaged store bought

DSC00893

Italian Beef Sandwich steps

  1. Slice the green pepper and onion and brown a bit in a medium high heat skillet then remove.
  2. Add the French rolls face down to the skillet until toasty and remove
  3. Add the Italian Beef to the skillet until it’s just warm then blend it with the green pepper, onion and cheese until the cheese is melted
  4. Top the French rolls with the beef vegetable blend and add the Horseradish. How much and how you see fit or what your taste buds and nose can handle

Add the sandwich, golden potatoes and side of your favorite vegetables to the plate and enjoy! BTW this tastes amazing!

This is how I  enjoy my green peppers and onions.

This is how I enjoy my green peppers and onions.

Hard Shell Tacos (kind of and after the fact) – Beef

DSC00889

This is a last minute recipe I came up with because I had a sudden urge for a spicy and crunchy meal. The crunchy part was going to be the hard shell but all I had on hand was flour tortillas so what to do? Pan fry them of course! I know flour tortilla don’t crisp up as corn tortilla would but I was not going to run out to the store for just that.

Ah the Ingredients

Ah the Ingredients

Ingredients for the Taco meat:

  • 1 pound Ground Beef 93% Lean – This just taste so much better then the higher fat content blend. I would go with grass fed if I could afford it.
  • Green Pepper – Chopped
  • Yellow Onion medium – Chopped
  • 1 can of Black Beans – drained
  • 2 Cloves of Garlic – diced
  • 1/4 cup of water
  • Dash of Salt
  • 1/4 teaspoon Cayenne Pepper
  • 1/2 teaspoon Ground Cumin
  • 1/2 teaspoon Paprika powder

Preparing the taco filing is simple and quick process as there are just a few steps until you can enjoy the wounder flavors.

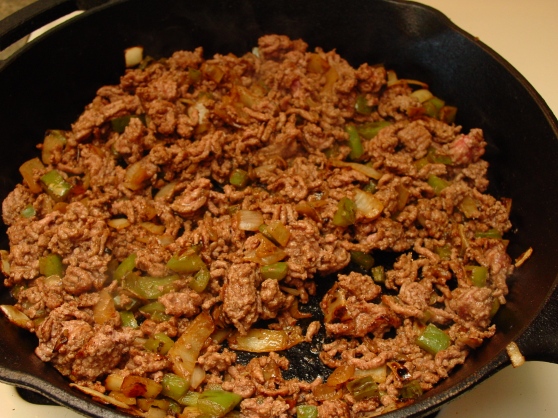
  1. Add the Green Pepper and Onion to a skillet heated to medium high heat cooking until soft. Be sure to stir every minute or two to cook evenly. 
  2. Add ground beef to the skillet browning and crumbling the meat
  3. Next into the skillet is the Black Beans mixing well then add the remaining ingredients mixing then reduce heat to low.

You will need additional ingredients to build your Tacos:

  • Couple table spoons of vegetable oil
  • Grated cheeses – I like the fine grate for this recipe
  • Flour Tortilla
  • Sour Cream
  • Ice Berg Lettuce
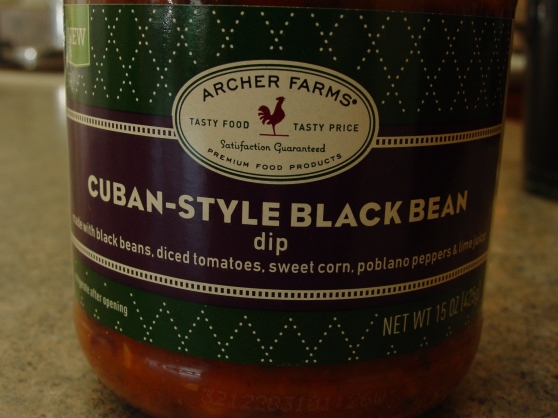
  • Archer Farms – Cuban-Style Black Bean dip – This is new at Target and it’s now my favorite. No I was not paid to say that it’s just a great product!

Heat a separate skillet to medium adding vegetable oil just enough to coat the bottom of the skillet. You have to work fast here as you don’t want to overcook the tortilla:

  1. Add tortilla to skillet
  2. Top with cheese and a couple tables spoons of the taco filling
  3. Fold tortilla in half cooking until bottom in brown then flip browning the opposite side.
  4. Remove from skillet and repeat these steps until you have the amount for this this meal. You can do more then one at a time but be sure not to burn them

As for plating your meal you can do this in many ways. You can add the taco to the plate then have dips surround the taco. You can build a mini taco salad. You can also just put all your toppings on top of the taco and eat it with a fork and knife. Be creative!

Soften the Green Pepper and Onion

Soften the Green Pepper and Onion

Brown the meat

Brown the meat

Add the remaining ingredients

Add the remaining ingredients

Give me some filling

Give me some filling

I love this stuff!

I love this stuff!

Make me fancy!

Make me fancy!

Corned Beef Hash with Golden Potatoes

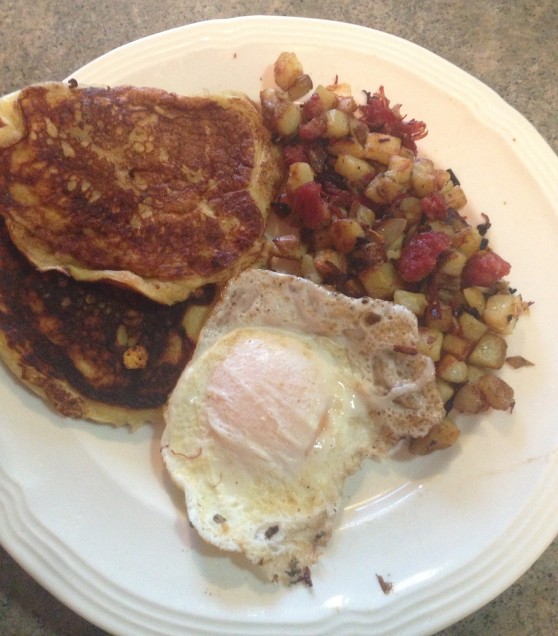
Corned Beef Hash with Golden Potatoes along with Greek Yogurt Pancakes and an over easy egg

Corned Beef Hash with Golden Potatoes along with Greek Yogurt Pancakes and an over easy egg

What to do with Corned Beef leftovers? Corned Beef hash of course!

Ingredients for the Corned Beef hash

  • Leftover Corned Beef of course
  • 3 medium sized Golden Potatoes – I will let you think this one over
  • 1 medium Yellow onion  – chopped
  • 2 cloves of garlic – diced
  • Dash of salt
  • Couple grinds of fresh ground pepper

This is a simple and tasty meal that pairs well with eggs and Greek Yogurt Pancakes.

The steps:

  1. Cube the raw potatoes in to small sizes
  2. Add potatoes to the skillet that has been heated to medium low and cook with the lid for about 10 minutes. You are trying to soften the potatoes. You can test the potatoes progress by using a fork to poke the potato piece. If the fork goes in easy you are ready for the next step. Each time you open the lid to test the potatoes be sure to flip the potatoes.
  3. Stir the potatoes keeping the lid off
  4. Chop the onion and add to a separate skillet heated to meduim high cooking until translucent then remove from pan
  5. Stir the potatoes again. You are trying to brown the potatoes just a bit
  6. Chop the corned beef  and add to the skillet you cooked the onion in cooking until crispy
  7. Now add the onion, crispy corned beef, garlic and chopped onion with the potatoes blending well. Be careful not to break up the soft potatoes.
  8. Now you are trying to crisp up your new blend so so you will need to make it flat using your spatula.
  9. Let the blend brown up and only flip a section at a time. Continue doing this until brown and crisp but not burnt!
  10. Add the salt and pepper to the mix then serve
  11. Enjoy!

Corned Beef

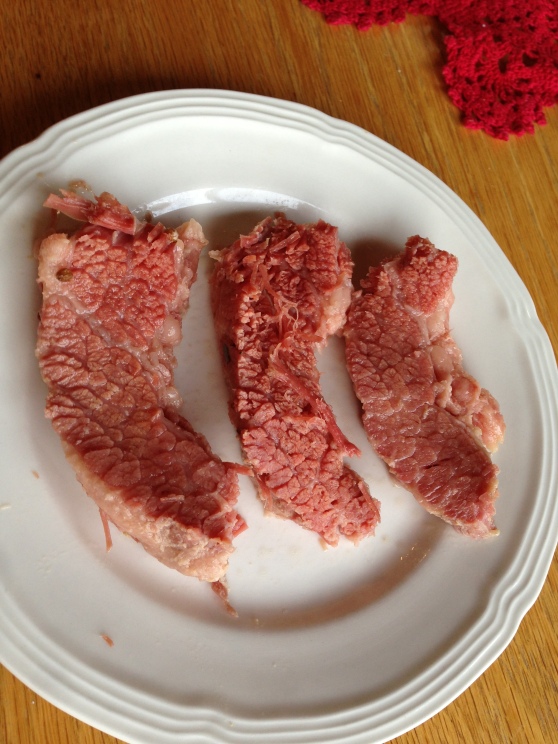
Does not look very exciting but this is very good!

Does not look very exciting but this is very good!

What is one to cook on St. Patrick’s Day if you have a little Irish in you or not?  Corned Beef of course! The thing is Corned Beef just does not take a very exciting picture but it does taste amazing! If you don’t want to spoil the mood keep your eyes off the nutrition label! The picture below is actually the second package I purchased. My family enjoyed the meat so much I dropped everything and went back to the store to get more. I am glad I went when I did because there was only a few packages remaining!

One of the advantage of having leftovers is you can make some great meals! I have a few ideas in mind and can’t wait to try them. Come back soon to see what I come up with.

Cooking this is very easy:

  1. Put this meat in a big pot covering the meat with water and start a boil. Once the boil begins skim the foam off the top of the water
  2. Reduce heat to a low simmer and put a lid on it letting it simmer for 2 1/2 to 3 hours
  3. Once a fork can enter the meat easily take it out of the pot and place on a cutting board and cut across the grain
  4. Add sides and eat!
Just unpack and follow the easy to cook steps.

Just unpack and follow the easy to cook steps.

All ready to cut across the grain and add sides.

Cut across the grain already  I am hungry!

Cut across the grain already I am hungry!

Cheese Fondue but not to spicy

I love cheese fondue!

I love cheese fondue!

I just love cheese fondue with fresh vegetables! Crunchy fresh vegetables dipped in warm cheeses is such an amazing taste I highly recommend you give this a try!

This is an easy recipe but does require a lot of chopping and self control not to sneak bites of fresh vegetables. You can use any dippers you want and you should mix it up a bit to keep things interesting. This time around I went with what is in the following picture.

The dippers!

The dippers!

Once you have the dippers ready you of course need to create the cheese fondue for well dipping.

Ingredients for the Fondue

  • 4 tablespoons of butter
  • 1/4 cup All purpose flour
  • 1 1/2 cups of Chicken Broth
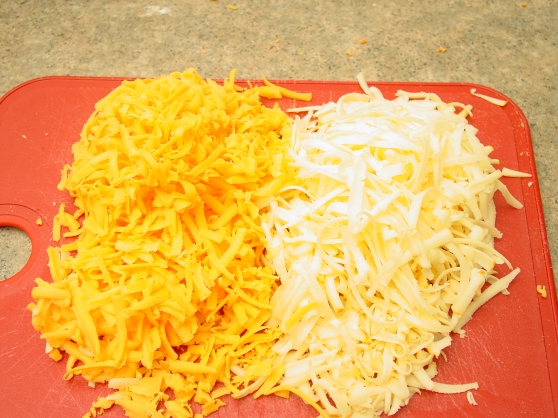
  • 16 oz of shredded cheeses – I went with Mild Cheddar and Muster this time around and glad I did!

DSC00777 DSC00784 DSC00788

Next up melt the butter over low heat and add the flour and stir for 3 minutes over low heat in your fondue pot.

DSC00793 DSC00794

Add the Chicken broth and boil for three minutes but you must stir the entire time to keep things right.

I have been boiled!

I have been boiled!

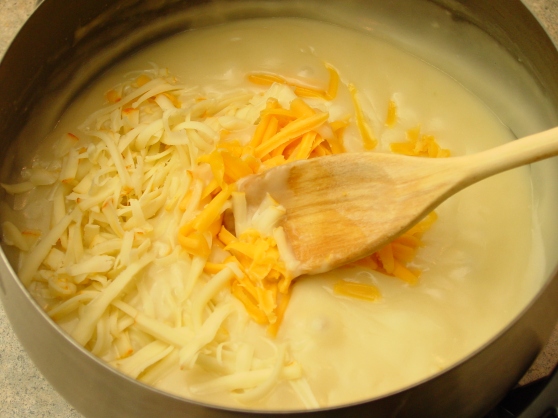
Now add the cheeses 1 cup at a time but be sure to stir things up after each cup until all the cheeses are in there and melted well. Keep things just warm and start the dipping!

First cup of cheeses.

First cup of cheeses.

Ready for dipping!

Ready for dipping!